
You’ve spent hours perfecting your grandmother’s lasagna recipe, but when it hits the plate, it looks more like cafeteria food than fine dining. Here’s the truth: 83% of diners judge a meal’s quality within the first 10 seconds of seeing it. That visual impression can make or break even the most delicious dish.
The difference between home cooking and restaurant-quality presentation isn’t just about expensive ingredients or years of culinary school. It’s about understanding the fundamental principles that transform ordinary plates into Instagram-worthy masterpieces. Whether you’re hosting a dinner party or simply want to elevate your weeknight meals, these professional plating techniques will revolutionize how you think about food presentation.
Why Food Presentation Matters
We eat with our eyes first, and neuroscience backs this up. When we see beautifully plated food, our brain releases dopamine before we take the first bite, priming us for a better dining experience. This psychological response explains why the same pasta dish can taste dramatically different when presented on a paper plate versus artfully arranged fine china.
The benefits of mastering food presentation extend far beyond aesthetics. Proper plating techniques enhance flavor perception, create memorable dining experiences for your guests, boost your confidence in the kitchen, increase the perceived value of your meals, and make your dishes social media ready. When you take pride in presentation, you naturally pay more attention to every aspect of cooking, from seasoning to timing.
Essential Plating Tools Every Home Cook Needs
Before diving into techniques, you’ll need the right equipment. Professional chefs rely on specific tools that most home kitchens lack, but you don’t need to break the bank to get started.
An offset spatula becomes your best friend for spreading sauces and moving delicate items without disturbing their shape. These angled tools cost between $8-15 and are available at any kitchen supply store. Squeeze bottles give you complete control over sauce application, allowing for precise drizzles and dots that would be impossible with a spoon. You can find them for $5-10 at restaurant supply stores or online retailers.
Fine-tip tweezers might seem excessive, but they’re essential for precise garnish placement. Culinary tweezers cost $10-20 and transform your ability to position microgreens and delicate elements exactly where you want them. Ring molds create uniform shapes and layers, particularly useful for composed salads and layered presentations. These typically run $15-25 at stores like Williams Sonoma.
Small spoons designed for sauce work help create professional dotting patterns and textures. A set usually costs $12-18 from professional kitchen suppliers. A simple bench scraper keeps your plate edges clean throughout the plating process and costs just $6-12. A microplane grater adds fresh citrus zest and finely grated cheese as finishing touches, available for $15-25 at most kitchen retailers.
Finally, a digital scale ensures portion consistency across multiple plates, essential when cooking for guests. Quality scales range from $20-40 and are available everywhere from Amazon to local kitchen stores. These tools transform your kitchen into a professional plating station without requiring a major investment.
The 5 Golden Rules of Professional Plating
Rule 1: The Plate is Your Canvas
Think of your plate as a blank canvas where every element serves a purpose. Choose plates that complement, not compete with, your food. White plates remain the gold standard because they provide neutral backgrounds that make colors pop. The plate size should match your portion – oversized plates make modest servings look stingy, while cramped plates create chaos.
Rule 2: Color Contrast and Balance
Professional chefs think in color wheels when plating. Aim for at least three colors on every plate, ensuring they complement rather than clash. Green herbs against red tomatoes, golden proteins beside purple vegetables – these combinations create visual interest that translates to enhanced flavor perception. Monochromatic dishes can work, but they require careful attention to texture and shape variations.
Rule 3: Height and Dimension
Flat food looks boring. Create visual interest by building upward and varying textures. Stack components strategically, lean proteins against starches, and use garnishes to add vertical elements. However, avoid the 1990s tower trend – height should enhance accessibility, not create engineering challenges for diners.
Rule 4: Negative Space Usage
Empty space isn’t wasted space; it’s breathing room that prevents plates from looking cluttered. Follow the rule of thirds: imagine your plate divided into nine sections and place focal points at intersection lines. This creates natural balance and guides the eye around the dish systematically.
Rule 5: Garnish with Purpose
Every garnish should be edible and enhance the dish’s flavor profile. Microgreens, herb oils, citrus zests, and edible flowers work beautifully when they complement the main ingredients. Avoid random parsley sprigs or cherry tomato halves that serve no culinary purpose.
Step-by-Step Plating Techniques
Technique 1: The Clock Method
Professional kitchens use the clock method for consistent plating across multiple orders. Imagine your plate as a clock face: proteins typically go at 6 o’clock, starches at 2 o’clock, and vegetables at 10 o’clock. This system ensures balance and makes plating faster during busy service.
Start with your protein as the anchor piece, then build around it. Place the largest component first, add complementary items, and finish with sauces and garnishes. This methodical approach prevents overcrowding and maintains visual flow.
Technique 2: Sauce Drizzling and Dotting
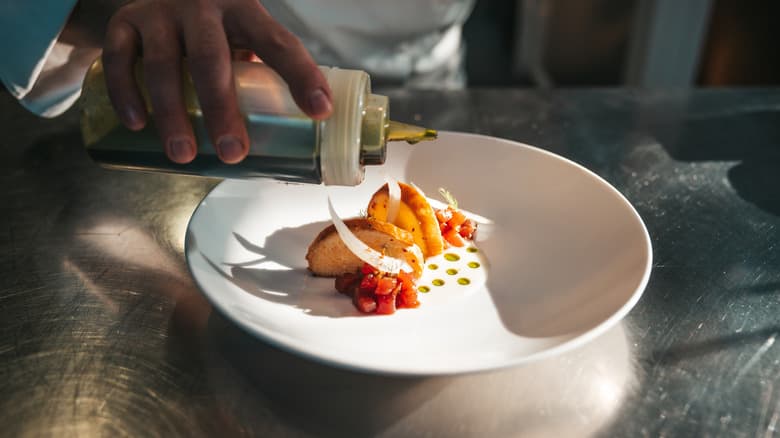
Sauces can make or break a plate’s appearance. For drizzles, start at one edge and move steadily across the plate with consistent pressure on your squeeze bottle. Practice on empty plates first to develop muscle memory and consistent hand movements.
For dots, hold the bottle perpendicular to the plate and apply quick, even pressure. The key is maintaining consistent bottle height and pressure for uniform results. Create sauce art with simple techniques by dragging a toothpick through sauce dots for hearts or feather patterns. Use offset spatulas to create smooth smears that add elegant touches to your presentation.
Pool sauces in strategic locations rather than drowning the food, and remember that less is more – you can always add more sauce, but you can’t easily remove it once applied. Practice these techniques during prep time so you can execute them confidently when plating for guests.
Technique 3: Layering and Stacking
Strategic layering creates depth and sophistication on any plate. Start with your base layer – often a sauce or puree – then build upward with complementary textures. Alternate soft and crispy elements for textural interest that engages multiple senses.
Use ring molds for uniform shapes when precision matters, or embrace freeform stacking for rustic elegance that feels more approachable. The key to successful stacking is stability. Ensure each layer can support the next, and avoid combinations that will slide or topple before reaching the table.
Technique 4: Microgreen and Herb Placement
Fresh herbs and microgreens add color, texture, and aromatic appeal, but placement matters enormously. Use tweezers for precise positioning, ensuring each piece lands exactly where intended. Choose herbs that complement the dish’s flavors rather than competing with them.
Avoid wilted or damaged pieces that detract from the overall presentation. Place garnishes where they won’t interfere with eating – guests shouldn’t have to move decorative elements to access their food. Consider height variations for visual interest, using some herbs flat against the plate and others standing upright for dimension.
Think of herbs as the final brushstrokes on your culinary painting – they should enhance, not overwhelm the composition.
Common Plating Mistakes to Avoid
Even experienced home cooks fall into predictable plating traps that diminish their dishes’ visual impact. Learning what not to do is often as valuable as mastering proper techniques.
Overcrowding the plate ranks as the most common mistake. Less is more in professional plating – give each element space to shine individually while contributing to the overall composition. Using the wrong plate size creates proportion problems that no technique can fix. Match plate dimensions to portion sizes for visual harmony.
Temperature considerations often get overlooked but matter enormously. Serve hot foods on warmed plates and cold foods on room temperature or chilled plates. This attention to detail separates amateur from professional presentations.
Inconsistent portions create visual imbalance that distracts from otherwise beautiful plating. Use scales and measuring tools to ensure uniformity when serving multiple guests. Keep plate edges clean throughout the plating process – smudged rims immediately signal amateur work.
Avoid mixing too many textures on one plate. Aim for contrast, not chaos. Three distinct textures usually provide optimal variety without overwhelming the palate or eye. Never add inedible garnishes – everything on the plate should serve a culinary purpose.
Finally, don’t rush the process. Take time to position elements thoughtfully. Professional plating requires patience and attention to detail that can’t be hurried.
Plating Ideas by Cuisine Type
Italian Dishes
Italian plating emphasizes rustic elegance and ingredient quality over fussy presentations. For pasta dishes, create a nest in the center of the bowl using tongs or a large fork, twirling the pasta into an appealing mound. Top with proteins and vegetables arranged naturally rather than geometrically.
Drizzle high-quality olive oil around the rim and finish with fresh herbs and grated cheese applied tableside when possible. Risottos benefit from quenelle-shaped portions formed with two large spoons, with garnishes placed asymmetrically for visual interest while maintaining the dish’s comfort food appeal.
Asian Cuisine
Asian plating often incorporates principles of balance and harmony derived from traditional aesthetic philosophies. Use negative space effectively, allowing the plate’s background to contribute to the overall composition. Arrange components in odd numbers – three or five pieces rather than even groupings – which creates more dynamic visual flow.
Incorporate height through strategic stacking, but keep structures simple and stable. Sauce applications tend to be more minimal and precise, often served alongside rather than underneath the food to preserve textures and allow diners to control flavor intensity.
French Techniques
Classic French plating emphasizes precision and elegance without ostentation. Sauces are carefully portioned and positioned with mathematical precision. Vegetables are turned uniformly and arranged with military-like attention to detail. Proteins are sliced to show internal doneness and fanned or positioned to highlight cooking technique.
The overall effect should be refined but not fussy, showcasing technical skill without overwhelming the diner or making them feel intimidated by the presentation.
American Comfort Food
Even casual dishes benefit from thoughtful presentation that honors their comforting nature. Stack burgers with architectural precision, ensuring each layer is visible and stable. Arrange fries in neat bundles rather than scattered piles, and use colorful vegetables to brighten traditionally beige plates.
The goal is approachable elegance that elevates the dish while honoring its comfort food roots. Don’t overthink these presentations – simple improvements in organization and cleanliness make enormous differences.
Photography Tips for Your Plated Dishes
Natural lighting produces the most appetizing food photos that translate well across social media platforms. Position your plate near a window with diffused sunlight, avoiding harsh shadows or artificial fluorescent lighting that creates unflattering color casts.
Shoot from a 45-degree angle for most dishes, as this angle shows both the food’s surface and its height. Overhead shots work well for flat presentations like pizzas, salads, or charcuterie boards, but can make three-dimensional dishes look flat and unappetizing.
Wipe plate edges clean before shooting, as camera lenses pick up smudges invisible to the naked eye. Use props sparingly to avoid distraction – the food should remain the star. Shoot immediately after plating while food looks fresh and sauces haven’t had time to separate or congeal.
Most modern smartphones have food-specific camera modes that adjust color temperature and saturation for more appetizing results. Consider your background carefully – simple, neutral surfaces work best and don’t compete with your carefully plated dish.
Remember that great plating translates directly to better photos, making your social media posts more engaging and shareable without requiring professional photography equipment.
Practice Exercises for Beginners
Start with simple dishes you already cook well, focusing on presentation rather than new recipes. This approach lets you concentrate on plating techniques without worrying about flavor development or timing unfamiliar preparations.
Practice sauce drizzles on empty plates before adding food, developing steady hand movements and consistent bottle pressure. Recreate restaurant presentations from photos you admire, analyzing how professional chefs balance colors, textures, and spatial relationships.
Experiment with different plate shapes and sizes for the same dish, observing how presentation changes with varying canvases. Round plates create different visual dynamics than square or rectangular ones, and size dramatically affects perception of portion and value.
Time yourself plating to build speed and confidence. Professional kitchens require consistent output under pressure, and practicing efficiency helps you plate confidently when entertaining guests.
Consistent practice builds muscle memory and develops your eye for balance and composition. Start with one technique at a time rather than trying to master everything simultaneously.
Conclusion and Next Steps
Professional plating isn’t about perfection – it’s about intention. Every element on your plate should have a purpose, whether aesthetic or functional. Start with these fundamental techniques and gradually develop your personal style that reflects your cooking personality and the dishes you love most.
The transformation from good cook to impressive chef often happens not in flavor development, but in presentation mastery. Take time to plate thoughtfully, invest in a few key tools, and practice regularly. Your dinner guests – and your Instagram followers – will notice the difference immediately.

Consider taking our cooking courses to further develop these skills alongside other culinary techniques that will elevate your entire cooking game. Professional instruction accelerates learning and helps you avoid common mistakes while building confidence in the kitchen.